Installation takes approximatley 2 hours, taking into account that you have already bought the required aditional parts (choke and throttle cables).
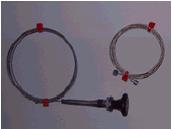
Choke cables are available from most motor factors and you can use a bicycle brake cable for the throttle. Don't forget to remove the outer carcass from the choke cable (as shown in the picture).
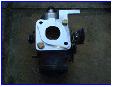
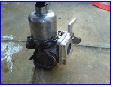
I recommend you give the SU a good clean and service before installing it onto your truck.
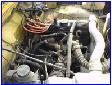
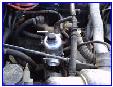
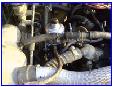
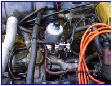
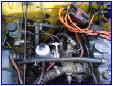
Firstly remove the old Suzuki carb and plastic spacer (shown in the second picture). Attach the plate to the SU ensuring it is the right way round and that the gasket is fitted. Before bolting the SU onto the inlet manifold check that you have a connection for the cables to go into. (I had to drill a bolt as the SU I had didn't have the parts attached).
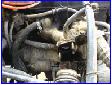
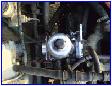
Bolt the SU onto the inlet manifold not forgetting the gasket, attach the airbox plate shortly after. Connect the breather pipes and fuel line. A T-Piece can be inserted into the original pipe from the oil breather and an extra length connected to the SU and the T-piece. Place the Airfilter pipe over the airbox plate making a small mark where the pipe touches against the bolts on the SU. Being carefull cut out 1cm squares inline with the marks. Ths will alow the airfilter pipe to fit comfortable onto the airbox plate. When this is done use a tie-wrap or similar to secure it in place.
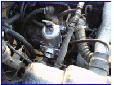
Next from inside the car pull out both the throttle and choke cables making sure the original carcasses stay in place. Oil and gently feed the new cables down their respective casings. The new choke can be attached to the dash as per the manufacturers instructions. Back in the engine bay, the throttle and choke bracket can be either attached to the top or underside of the mount. Which way you do it is upto you and depends on your car setup. Attach the carcasses to the bracket and connect the cable ends to the SU.
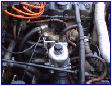
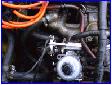
You should now have everything connected. Check all the cables, pipes and bolts before starting the engine. The car will probably need tuning, this can be done at either your local garage or by yourselves.
Have fun with the extra torque.
Credits
This SU carburettor conversion installation article was written by Greg Holloway Copyright © 2006, and was used on suzukilubuk.com with his permission. The original article can be viewed here, where the kit can be purchase online.
Should you have any enquiries please email the author at This email address is being protected from spambots. You need JavaScript enabled to view it.


![0610_4wd_01z+suzuki_samurai+group_of_suzukis[1274].jpg](/images/gallery/favourites/0610_4wd_01z+suzuki_samurai+group_of_suzukis[1274].jpg)


![fenderfrt6_SJ-1[376].jpg](/images/gallery/favourites/fenderfrt6_SJ-1[376].jpg)