Here are some interesting articles written by guests and members
We would like to take this opportunity to invite you to send us any material of your own for inclusion on this site.
Send us an E-mail to This email address is being protected from spambots. You need JavaScript enabled to view it.
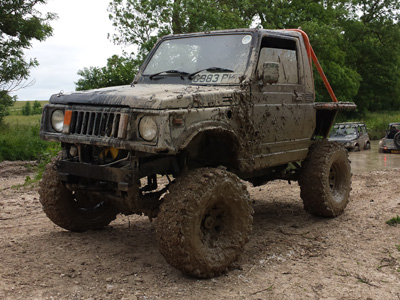
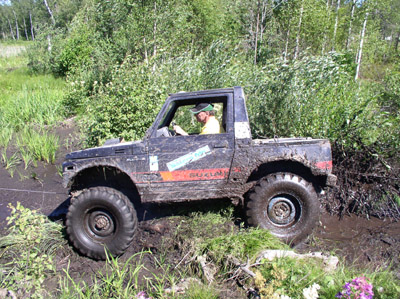
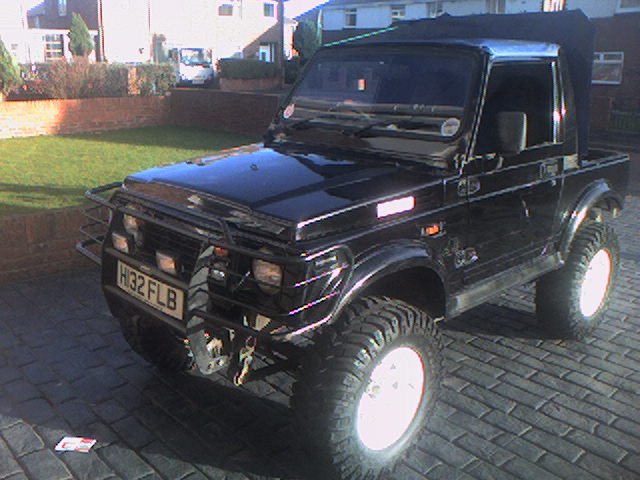
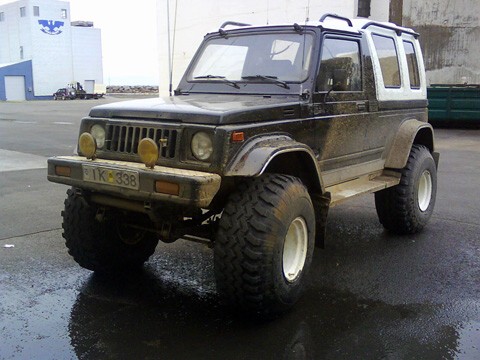
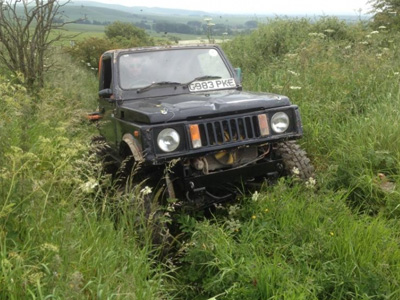
Suzuki SJ Buying Guide
test
Buying a Suzuki SJ
First things first you need to decide which model of Suzuki you want, I won’t go into details of all the model codes (VBJA, QJA, Sport etc.) just the three basic models.
The following is a rough guide to the models and changes, the years are approx.. dates, there are variations between when the changes were made in other countries and many have been privately imported. Plus the fact many SJs have been modified from their original spec over the years and upgraded.
SJ410


The SJ410 is the earliest of the three Suzuki SJs that were introduced into the UK around 1982/83 and came with a 970cc engine with an iron block and aluminium head with 45bhp@5500rpm and54lbs/ft@3000rpm, a 4 speed manual gearbox, 4.11:1 diff ratios and drum brakes front and rear, a transfer box drum parking brake and what is known as the ‘skinny prop shafts’. The interior had a metal dash board and the same steering wheel as the LJ80.

Around 1984 the front brakes were uprated to discs and they started fitting the newer style transfer box with a 4wd light switch, which is essentially the same transfer box that was used for the rest of SJ series but has lower gearing fitted; 1.58:1 high and 2.58:1low. This is also the transfer box that is used to build a ‘Rocklobster transfer box’ (More info can be found in the DIY section)
In 1986 the interior was changed and they fitted a new style dash board

Also in 1986 Suzuki bought a share in the Santana motor company in Spain and Santana started producing Sjs as well as in the Japan factory, the SJ410 santana was fitted with a 5 speed manual gearbox and servo assisted brakes improving it’s on road performance and lowering the rpm at higher speeds.
SJ413

Around 85 the SJ413 came into production, this had quite a few upgrades including a new 1324cc all aluminium engine running an Aisin carburettor with 63bhp@6000rpm and 74lbs/ft@3500rpm, a 5 speed manual gearbox and larger differentials with a 3.909:1 ratio, the ratios in the transfer box were changed to 1.409:1 high and 2.26:1 in low. They also changed the front end with a new plastic grill and a taller bonnet to clear the larger engine.
Samurai

In 1986 the SJ413 Samurai came into production, this was essentially the same as the SJ413 however the axles were made 100mm wider and they moved the spring spacing outboard 40mm on each side to improve stability. With this came new wider wheel arches and the addition of some extra external trim in the form of sill covers and bumper corners; the diff ratios were also changed to 3.727:1.
They also introduced a new style dash board.

In 1992 the Samurai had a few improvements and they changed the engine capacity to 1298cc and added a Single Point Injection (SPI) system to improve economy and reduce emissions with 69bhp@6000rpm and 76lbs/ft@3500rpm
Which SJ is for you?
If you just want an SJ that you use occasionally for short trips, offroading and in particular Trialling then It doesn’t matter which one you go for really, yes the SJ410s are underpowered compared to the 1.3 but off road they come into their own. The F series engine loves to rev and the lower gear ratios, smaller diff housings and narrower track really help in off road situations, the narrow track means that they do not sit in land rover width ruts so you rarely ground the diffs out.
I personally also prefer the narrower spring spacing on the SJ410 and SJ413 as I find it reduces the roll stiffness helps improve articulation especially when combined with a wider track width using wheel spacers or offset wheels (or when running samurai width axles like me)
On road a healthy SJ410 should easily hit over 60mph and happily cruise along at this sort of speed, however if you have a 4 speed model they do sit at quite high rpm at these speeds so if you are planning on doing long journey’s occasionally I would recommend finding one with a 5 speed gearbox or fitting one, however the 5 speed gearboxes are quite sought after and hard to find nowadays.
If you are looking for an SJ that will be used daily and possibly see quite a lot of road miles then an SJ413 or Samurai would probably be better suited, they still have the same off road agility but have a bit more power and will happily cruise at higher speeds at lower rpms because of the gearing.
When looking to buy an SJ, there are certain things you need to look for.
Engine
The engine is as prone to faults as any other engine so make sure you follow all the usual steps when checking a car over - start the car from cold, let it warm up and switch it off and try starting it again. Check for clouds of blue smoke, if there is a lot of blue smoke when the vehicle first starts up this will indicate that the Valve stem oil seals need replacing, this is quite common with the SJ410 engine, but it’s not too bad a job to fix. If the blue smoke is still there once it’s warmed up and under acceleration etc. this could indicate that the piston rings need replacing. Listen for any bottom end knocks when cold and noisy Tappets, the tappets are not Hydraulic on SJ engines though so it’s nice and easy to adjust them. Leave the SJ to tick over for a while and check that it does not overheat or start to kick out any white some. The temp gauge should sit between ¼ and ½ way up. If it starts to rise or blows water out then the head gasket need changing, again this is quite a simple job on an SJ but I would advise checking the head for warping using a straight edge and feeler gauges and get it skimmed and pressure checked if it is out of spec.
Suzuki SJ410 1000cc Carb Engine

Suzuki Samurai/SJ413 1300cc Carb Engine

If you are buying a Samurai or SJ413 with the engine shown above, a common point of failure is the carburettor. They are very good and fuel efficient when they are in tip top condition, but they are well known for failing.
If the car you look at has a very high idle speed (2,000 rpm+) until it is warm, this could mean that the auto choke is beginning to fail. For the carbed SJ purchaser, a Weber, SU or Nikki carb is a very good mod to have already done! We have guides for fitting different carbs, and help is always available in the forum!
Suzuki Samurai 1994 + 1995 Fuel Injection Engine

You can tell the difference between the carb and fuel injection Samurais quite easily.
The most obvious point is the "plenum chamber" that connects the carb/throttle body to the air box.
Looking at the 2 pictures above, you can see that the carb model is round, and the fuel injection model is square! There are also a lot of sensors and wiring connected to the engine.
If you are buying a fuel injected Samurai, they are very good engines all round! However, there are a few parts for injected Samurais that are hard to come by such as the indictor stalk, and the fuel tank.
Transmission & Bearings & Brakes
I would advise taking a trolley jack with you when going to view and SJ to check the wheel bearings and king pin bearings, jack up each wheel (under the U-bolt spring plates) and give the wheels a spin listening out for rough wheel bearings and checking to see if the brakes are stuck on and binding, Calliper rebuild kits are available so this isn’t too much of a problem.
Grab the tyres at the top and bottom and give them a wobble to check for any movement and play, if you can feel any play on the front it’s worth getting someone else to do the wobbling so that you can look to see if the play is coming from the wheel bearings or kingpin bearings, if it’s the kingpin bearings you’ll see the knuckle felt/seal moving on the knuckle ball, if it’s the wheel bearings then the knuckle will stay still and the wheel and brake disc will move together, if the wheel bearings are still quiet when spun then you can adjust the bearing preload to remove the play.
Wheel bearing kits can be found for around £25-30 a corner and kingpin bearing kits (with an inner axle oil seal) can be found for about the same per side.
On the note of the inner oil seal, if this has failed there will be traces of oil on the steering knuckle.
Now it’s time to crawl underneath, take it out of gear and take off the handbrake but make sure it’s not going to roll anywhere, grab each propshaft and give it a wobble at each UJ in all directions to check for play, 1mm or so of movement is usually ok but any excessive play and the UJ needs to be changed, these are about £25 each for a good quality replacement and take about 30mins to change, don’t forget to check the prop shaft between the gearbox and transfer box as well, if one of these fails it can break the gearbox in quite a spectacular fashion!
Give each differential flange a wobble up and down, in and out, there should be no play or oil leaks. If there is then the diff ideally needs new pinion bearings, a seal and a new crush collar and this should be done by an experienced mechanic as differentials need to be set up to very specific tolerances..
Take it for a drive and listen for any transmission whines and noises, you will be able to hear the transmission but it should not be loud or too noticeable. The gear change should be quite mechanical feeling but easy to get into gear., when coasting to a stop it is perfectly normal for the gearbox to not want to engage 1st, this should only really be done stationary as 1st gear is very low on these gearboxes, I always put it into second when slowing down to a stop at traffic lights etc. 1st and reverse should be easy to get into stationary, sometimes when engaging reverse you might need to double clutch in neutral though. Bring the car to stop and engage 4 wheel drive and check that you can select hi and lo ratio. ( If the SJ has free wheel hubs ensure they are set to the lock position or you will still only have the benefit of 2 wheel drive).
DO NOT attempt to drive any amount on road in 4wd though, a short drive forwards and backwards in a straight line is ok to check that it all works is ok though.
Rust
The SJ in general, is a very reliable car. The main thing that ALL SJ’s suffer from is rust. They can and will rust anywhere – but here I’ll show you all the main places to look. Don’t be afraid to have a bit of a poke around, if the seller is genuine then he/she really shouldn’t have a problem with you having a thorough look, after all if it’s so rotten that it’s going to crumble away anyway then it won’t make a difference if you stick your finger through it as an MOT tester will just do the same. Because SJs have a separate ladder chassis the rust will only fail an MOT if it is within 12” of a body or seatbelt mount. Also keep an eye out for any bodged repairs with lots of filler, fibreglass and riveted on panels within those areas. The pictures added to this section are worst case scenarios (most of which are on vehicles that I have repaired)
Check around the windscreen surrounds and bumpers, mud collects on the inside of the bumpers and holds water in rusting them out from the inside.
Have a good look and feel up around the wheel arches, they usually rust out at the join between the inner wing and outer panel.
Look all around the bulkhead a the front of the SJ around the body mounts and pull up the carpet in the foot wells and check around the inner sills.
Check along the inner and outer sills, mud and water often finds its way into the sills and rots them out, if it’s a samurai mud and water often collects behind the plastic trim rotting through the outer sill as well, so try to have a look behind the covers if you can. The sills aren’t too bad a job to repair and replace but it does involve lying on your back and welding unless you have access to a ramp so can be a bit awkward.
The main area to watch out for as it is the hardest to repair is at the front of the rear wheel arches, around the body mounts and floor in the corners where the floor rises up into the rear bed behind the seats (best to push the seats forwards, pull the carpets up and look from the inside) if the rust has only effected the inside it is not too bad. Also if it’s just affected the area in the wheel arch then it’s quite a simple repair, but will require a lot of grinding as there are quite a few layers of steel then often turn into one large rust sandwich that will need to be cleaned up back to solid metal if you want to do a proper repair. However if the rust has spread all around these body mounts and into the sill then the body will need to be raised from the chassis so that you can access the mounts and inner sill for welding because the chassis outrigger restricts access.
Next lift the bonnet and look around the headlights, if possible remove the front grill/light surrounds to do this. Look under the battery, if often rusts out behind the battery and on the bulkhead.
Look around the back of the rear arches in the rear floor, on the driver’s side there is a cover for the fuel filler neck, if possible remove this and check around this area as it can be awkward to repair.
If it’s a tin top also look around the rear door hinges.
Although the body has a tendency to rust, luckily the chassis only suffers from surface rust, which can be easily removed and treated, before painting with an anti-rust primer and coating with underseal/paint.
Of course, if you are buying an SJ to go off roading in, a certain amount of body rust is nothing to worry about - as it’s soon going to pick up lots of nice scratches and dings anyway, but do check the underside for any signs of damage caused from previous off road use. Especially check the differential housing, cross members and axles.
MODIFICATIONS
Personally I would prefer to buy an SJ that is as close to standard as possible or with only minimal modifications that have been carried out to a good standard. This might end up costing a bit more in the long run but unfortunately because SJs are so easy to work on you get a lot of people trying to carry out modifications themselves that really shouldn’t be let near a grinder or welder.
Engine conversions
If buying an SJ with an engine conversion always check that the engine conversion has been declared with the DVLA and the capacity and fuel type matches what is written on the V5! Fitting an engine larger than a 1.5l moves the vehicle up a tax band and also if an engine conversion is not declared on your insurance then your insurance is void.
The most common engine conversion on SJs is fitting one of the 1.6 Vitara engines, In an SJ413 or Samurai this if very straight forward and only really requires an adapter plate to mate the engine and gearbox and the use of a ‘skinny starter’. Many will argue that you don’t need an adapter plate and a bit of grinding on a ‘fat starter’ and the engine block will make the starter fit however I prefer to do the job properly and with adapter plates only costing £40-50 it saves a lot of hassle and leaves no large gaps around the bell housing for mud and debris to get in. A simple modification to the driver’s side engine mount is also needed.
If fitting a 1.6 into an SJ410 it is a little bit more complicated but there are a few threads on the forum about this.
Many other engines have been fitted to SJs over the years from 1.5 diesel engines to 2.0 Vauxhall redtops, just make sure that all the engine mounts look like they have been fabricated well and as stated before make sure that the engine is registered on the V5.
Suspension
There’s a lot of different suspension modifications and set ups available so I will be writing a seperate guide detailing what to look out for with each set up as soon as possible.
DIY Mechanics
test
Some people may find the concept of doing your own mechanical work quite daunting! You really don't need to be worried! Suzuki 4x4s are all very easy to work on even for an absolute beginner!
For instance, when I got my first SJ 12 years ago, I knew nothing about cars (except how much it costs when they break!). Now, I've done multiple engine swaps, suspension conversions, made my own exhausts...
I started off by doing easy things, like changing brake pads and shoes. You don't really even need a proper set of tools to do jobs like that!
Many people I know who have bought SJs have ended up getting rid of them again,
purely because they can't be bothered to pick up a spanner.
My attitude is, once you have done something once it will be much easier the next time!!!
Recommended Tools for a DIY Mechanic
Firstly you will be needing a spanner and socket set. You may think that you will need an expensive set, like Snap-On or Blue Point, but you really don't! A home DIY mechanic can get along nicely with a halfords own brand tool kit.
I have 2 toolkits. One of them I got from Screw Fix. They don't sell it any more but it's a bit like this one, except in a metal toolbox: http://www.screwfix.com/p/socket-wrench-set-89pcs/33892
You get quite a good selection of tools for the money there!
My second set, I got from Halfords, it has most of the same sockets in, but was only £50. They probably won't all come in the same kit, but key spanner sizes to get are:
6mm, 8mm, 10mm, 11mm, 12mm (x2), 13mm, 14mm, 15mm, 17mm, 19mm (rarely used)
Sockets you will get a whole range of sizes, but they ones you want are mostly the same as the sizes above!
The next thing you will need is a trolley jack and axle stands. My original trolley jack is just a cheapy Halfords one again. Its only a 2 tonne jack, but it's easily good enough for most Suzukis!
I think I paid £30 for it quite a while ago.
You really, really should get some axle stands.
It isn't safe at all to be working under a car just supported by a jack
A wheel brace comes in handy a lot! Personally I prefer the extendable type, as they are compact for storage, and when extended can give very good leverage for undoing tight bolts!
A metal bar is a very useful think to have around the workshop. Ideally you want a metal bar that is long enough to give good leverage, and also one that is hollow, and the correct size to fit over the end of your socket wrench. This way, you will find it much easier to get difficult nuts and bolts undone!
You will also need screwdrivers, wire cutters and pliers. These are at their most handy when you are doing electrical work, but there's always a use for them! Try to get regular pliers, AND needle nose pliers as well
For wiring and electrical, get yourself a crimp tool! Properly crimped connectors will make your wiring much more robust, and you will save yourself from problems in the long run!
A multimeter or voltmeter can be expensive sometimes, but it's a very worthwhile investment!
I think that's the main tools you will need to get started working on your Suzuk. Just remember, if you have problems with anything or are stuck for ideas, you can always visit our forum to ask for tips or advise!
Click here to visit our Forum
Prices from the Past
test
Price List from 1995
Here are the prices of the Suzuki Samurai, and Santana range extracted from a 1995 price list. Included at the bottom of the page, are the Delivery and Number Plate charges from the same year.
| Model | Body Type/Trim Level | Doors | Base Cost | Charges/Tax | Total Cost |
|---|---|---|---|---|---|
| Santana/410 | Soft Top | 3 | TBA | TBA | TBA |
| Estate | 3 | TBA | TBA | TBA | |
| Samurai | Soft Top | 3 | 6804.26 | 1190.74 | 7995.00 |
| Estate | 3 | TBA | TBA | TBA | |
| Vitara | Sport (2 Seater) | 3 | 7872.34 | 1377.66 | 9250 |
| JX (2 Seater) | 3 | 8212.77 | 1437.23 | 9650.00 | |
| JX | 3 | 9063.83 | 1586.17 | 10650.00 | |
| JLX | 3 | 9574.47 | 1675.53 | 11250.00 | |
| JLX SE | 3 | 10204.26 | 1785.74 | 11900.00 | |
| Vitara Estate | JX | 3 | 9063.83 | 1586.17 | 10650.00 |
| JLX | 3 | 9574.47 | 1675.53 | 11250.00 | |
| JLX SE | 3 | 10204.26 | 1785.74 | 11990.00 | |
| JX | 5 | 10204.26 | 1785.74 | 11990.00 | |
| JXL SE | 5 | 11489.36 | 2010.64 | 13500.00 | |
| X-EC | 5 | 12723.40 | 2226.60 | 14950.00 | |
| Factory Options | Metallic Paint | Samurai 3 Door | 170.21 | 29.79 | 200.00 |
| Metallic Paint | Vitara 4 Door | 170.21 | 29.79 | 200.00 | |
| Metallic Paint | Vitara 5 Door | 212.77 | 37.23 | 250.00 | |
| Delivery and Number Plates | (All Vehicles) | n/a | 327.66 | 57.34 | 385.00 |
Credits
Article Written and Submitted by Ian Jones
Your SJ and the MOT test
test
Everyone who uses a vehicle on the road is required to keep it in a roadworthy condition. The roadworthiness is checked in the interests of road safety and the environment by the test we call the MOT.
The MOT looks at some important items on your car to see that it meets legal requirements when it is tested. You should be aware that the MOT certificate is not a guarantee of the general mechanical condition of a vehicle.
What is Included in the MOT test?

- Vehicle structure:
- Free from excessive corrosion or damage in specific areas, no sharp edges.
- Fuel system:
- No leaks. Cap fastens and seals securely. The fuel cap will need to be opened. Make sure the key is available.
- Exhaust emissions:
- Vehicle meets the requirements of exhaust emissions, dependant on the age and fuel type of the vehicle.
- Exhaust system:
- Secure, complete, without serious leaks and silences effectively.
- Seat belts:
- All the seat belts installed are checked for type, condition, operation, and security. All compulsory seat belts must be in place.
- Seats:
- Front seats secure. Front and rear backseats can be secured in the upright position.
- Doors:
- Open and close. Latch securely in closed position. Front doors should open from inside and outside the vehicle. rear doors may need to be opened to gain access to testable items.
- Mirrors:
- Prescence, condition, security.
- Brakes:
- Condition, operation and performance (efficiency test). Note the removal of road wheels is not part of the test.
- Tyres and wheels:
- Condition, security, tyre size / type and tread depth. Spare tyres are not inspected.
- Registration plates:
- Condition, security, digits correctly formed and spaced.
- Lights:
- Condition, operation, security, and correct colour. Also the headlamps will be checked to see if the aim is correct.
- Bonnet:
- Secures safely in the closed position.
- Wipers / washers:
- Operate to give the driver a clear view ahead.
- Windscreen:
- Condition and driver's view of the road.
- Horn:
- Correct operation and right type.
- Steering and suspension:
- Correct condition and operation.
- Vehicle identification number:
- Not more than one different identification number should be present on a vehicle first used on or after 1 August 1980
Where do I get an MOT?
There are around 19,000 garages approved as MOT test stations all over the country, which can carry out your MOT test.
The blue three triangles logo which they have to display identifies approved test stations.
The maximum fee for the test should be displayed on a poster inside every test station. A test station may charge less than this if they wish.
How are Vehicles Tested?
MOT test stations have designated test bays where they conduct the test, using a range of specialised equipment.
The standard test procedures are laid out in a manual which the test station should make available to you if you want to look at it.
If your vehicle has failed the test, you will be given a failure document with reference to this manual.
You can watch the test from a designated viewing area but you are not allowed to interrupt the tester while he is working. 
All MOT testers have been on a training course with the Vehicle and Operator Services Agency and their competence is checked regularly.
Who Supervises the scheme?
VOSA is the Govermnment Agency responsible for supervising the MOT scheme. It does this by:
- Authorising MOT stations and nominated testers
- Setting standards for testing and conditions of appointment for the test station andtesters.
- Training authorised examiners and MOT testers.
- Visiting garages on a regular basis and carrying out checks to ensure testing standards are maintained. This will include checking the testers' competence and maintainence of approved equipment.
- Giving advice/taking disciplinary action wher tests are not being carried out to therequired standards.
- Dealing with appeals and complaints from MOT customers.
What if I disagree with the test result?
Discuss it with the MOT test station if possible. Do not let anyone carry out repairs to the vehicle. If you think your car:-
- Has been incorrectly failed:
- Complete appeal form VT17 available from any MOT test station or ring our enquiry line, 0845 600 5977. You must complain within 14 working days of the test and VOSA will require a full test fee from you. VOSA will then offer an appointment within five days to re-check your vehicle. If your appeal is successful some or all of the test fees will be refunded to you.

- Has been incorrectly passed:
- Let VOSA know as soon as possible. Subject to acceptance for appeal VOSA will offer an appointment within five working days to re-examine your vehicle (without charge) provided:
- Not more than 3 months has elapsed since the time of the test for a corrosion defect, or;
- Up to 28 days for other defects.
The address fo your local Vehicle and Operator Services Agency (VOSA) office is displayed in the MOT test station or can be obtained from VOSA general enquiries unit on 0845 600 5977.
VOSA provide this service as a means of monitoring the MOT system and road standards generally.
VOSA cannot seek redress or compensation on your behalf - although it is open for you to take action in conjunction with your local trading standards department; take out proceedings personally or refer the matter to the Police.
VOSA can supply you with the inspection report listing any vehicle defects and advisory items following their check of the vehicle.
Any subsequent action which VOSA may decide to take against the testing station which tested your vehicle will be at VOSA discretion, and should have no bearing on any action you may decide to take.
What if you think the MOT certificate is not genuine?
Ring the MOT enquiry line number on 0845 600 5977. Calls are charged at the local rate.
If you have lost or damaged your test certificate
If you have lost or damaged your test certificate but know where and approximately when the vehicle was tested you can obtain a duplicate test certificate from the MOT test station which tested the vehicle.
If the test station has closed down the VOSA local office will be able to help. The maximum fee for a duplicate certificate is £10-00 or half the test fee if this is less.
If you do not know where the car was tested originally you cannot obtain a duplicate certificate. You will need to have the car tested again.
If you are unhappy with the service
If you are not satisfied with the way your test was conducted, please let VOSA know, as it helps them to make sure MOT stations are providing a good service.
Contact the Area Manager at your local VOSA office. The address is shown on the "Fees and Appeals" poster at your MOT test station, or you can ring the MOT enquiry line on 0845 600 5977.
Credit
The above article was taken from the MOT brochure issued by VOSA (Vehicle & Operator Services Agency) issued in May 2004.
The VOSA address is:-
Berley House
Croydon Street
Bristol
BS5 0DA
www.vosa.gov.uk

![0610_4wd_01z+suzuki_samurai+group_of_suzukis[1274].jpg](/images/gallery/favourites/0610_4wd_01z+suzuki_samurai+group_of_suzukis[1274].jpg)

![fenderfrt6_SJ-1[376].jpg](/images/gallery/favourites/fenderfrt6_SJ-1[376].jpg)