Zuk on 38's

Got an vehicle build underway? post up pictures and tell us all how its going!

Builds threads only please.
User avatar
TanZuk
Engaged 4wd low
Engaged 4wd low
Posts: 234
Joined: Thu Jan 05, 2012 11:17 pm
Location: Pompano Beach, Florida US

Re: Zuk on 38's

Post by TanZuk » Thu Feb 23, 2012 11:09 pm

Toy-Zuk Hybrid Steering Link

Here are the parts I used to attach the Zuk steering column to the FJ80 box.

Toyota 1980 4x4 Steering Slip Yoke Link

Zuk stock steering link

NOTE:

These pieces were shortened, machined the ends for a press fit then tig welded.

The reason I used the Toy slip yoke was to let the shaft be able to move under flex. I have seen other parts used I thought this would be a better solution. I have had a couple Toy 4x4 and the slip link worked well.


Image


Image

User avatar
TanZuk
Engaged 4wd low
Engaged 4wd low
Posts: 234
Joined: Thu Jan 05, 2012 11:17 pm
Location: Pompano Beach, Florida US

Re: Zuk on 38's

Post by TanZuk » Thu Feb 23, 2012 11:10 pm

Here is a comparison pic:

Without Front Bumper and Valance

With Front Bumper and Valance


Image

User avatar
TanZuk
Engaged 4wd low
Engaged 4wd low
Posts: 234
Joined: Thu Jan 05, 2012 11:17 pm
Location: Pompano Beach, Florida US

Re: Zuk on 38's

Post by TanZuk » Thu Feb 23, 2012 11:12 pm

I have looked at a lot of build threads the past bunch of years. I haven’t seen anyone use this trick or they never showed it. This is what I do before I even think about spending any money or proceeding with any mods.

I hope this Helps out.

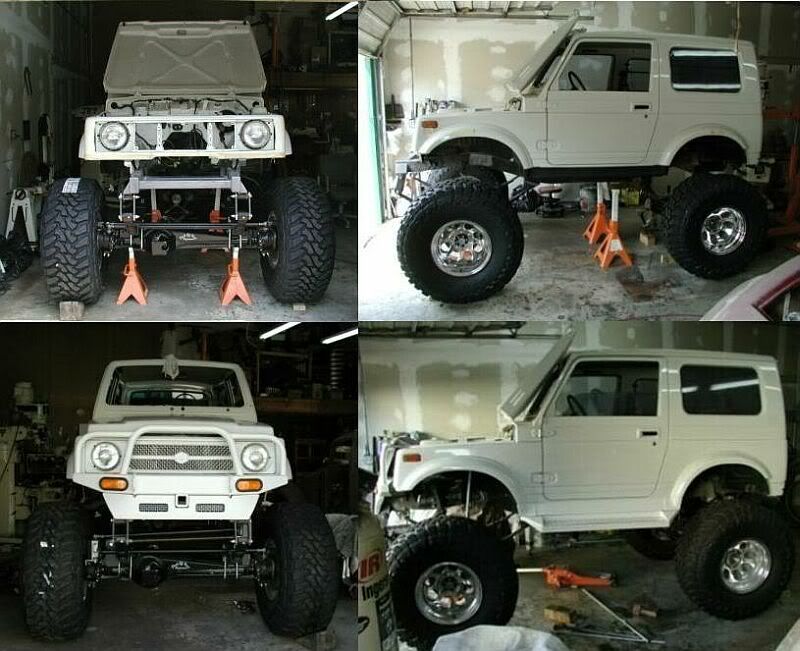
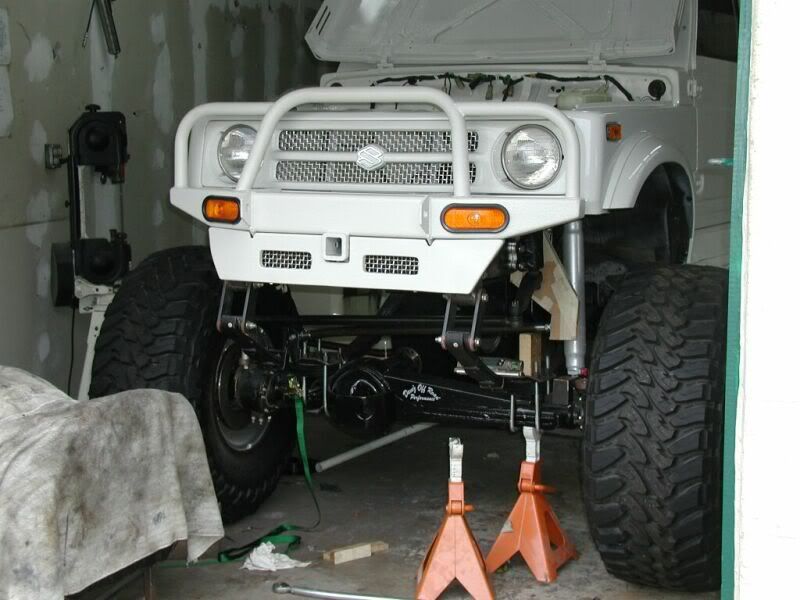
My build was starting with the 38’s. I needed to see if these were going to fit and what is going to need to be done to accomplish the entire mod.

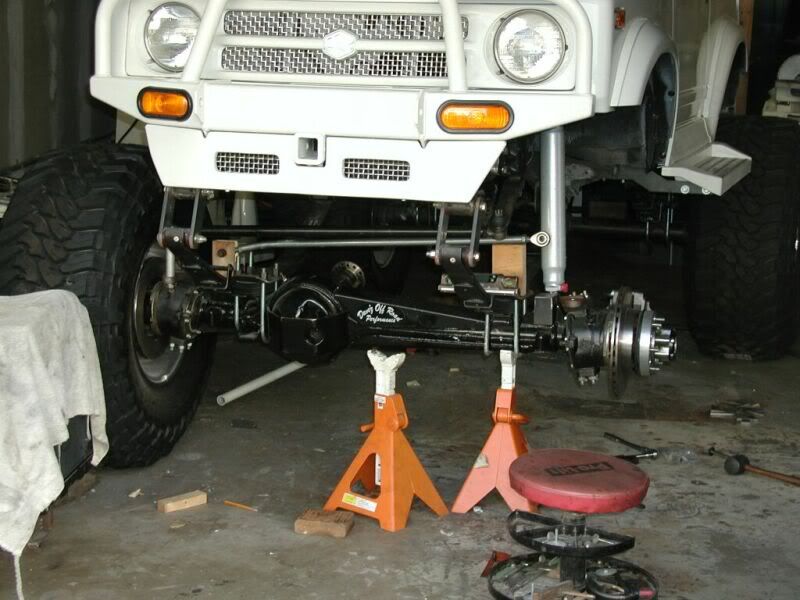
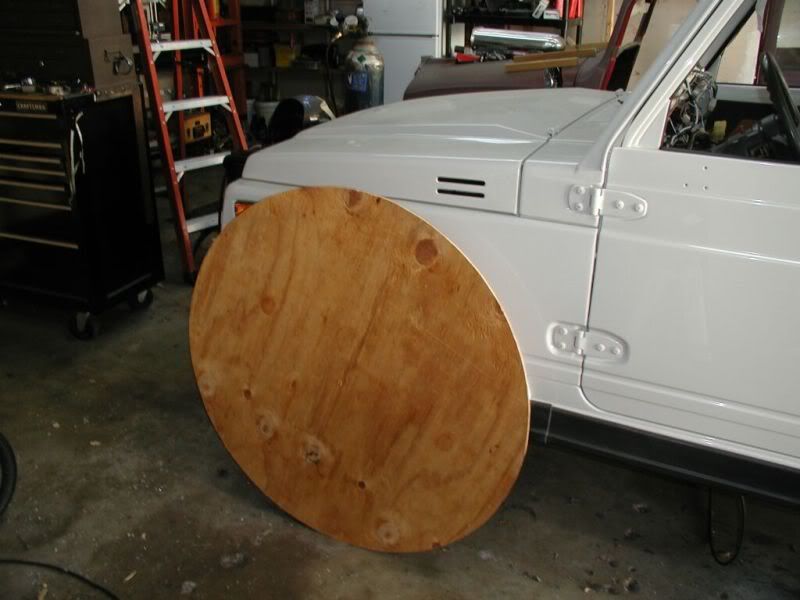
The trick is making a 38” wood tire out of plywood. The next thing is to get it in the air enough to fit the wood tire. Once this is done you start making a plan of attack.

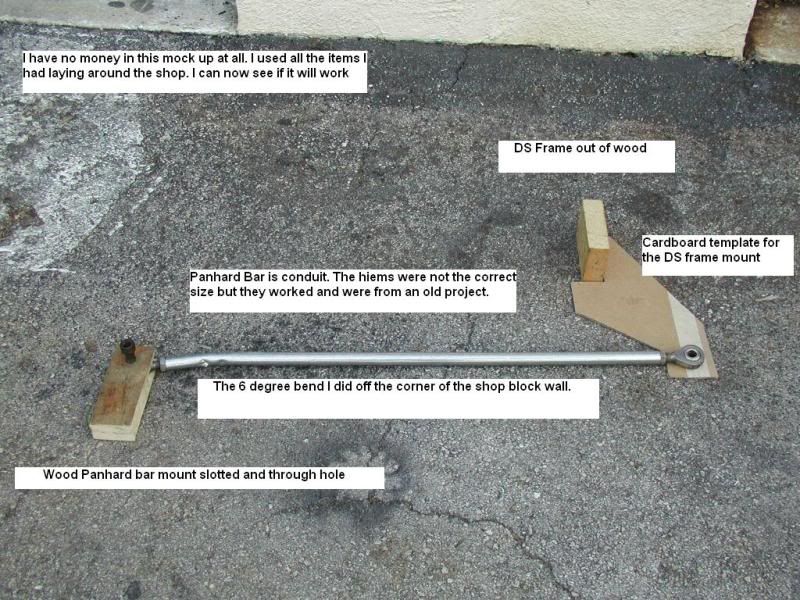
The plan was to move the front axle 4-5 inches forward and the back axle 3 inch to the rear. There was also going to be a stretched front frame that worked out to be 8 inches. I also wanted to cover the extension as much as possible with the bumper.

This was just the minimum plan of attack and was very subject to change.

Here are a couple of pics to give you an idea what I’m talking about.


1st pic is of the 38" wood tire. I got a lot of yea rite when some of my friends stopped by. They have all since changed their minds.

Image


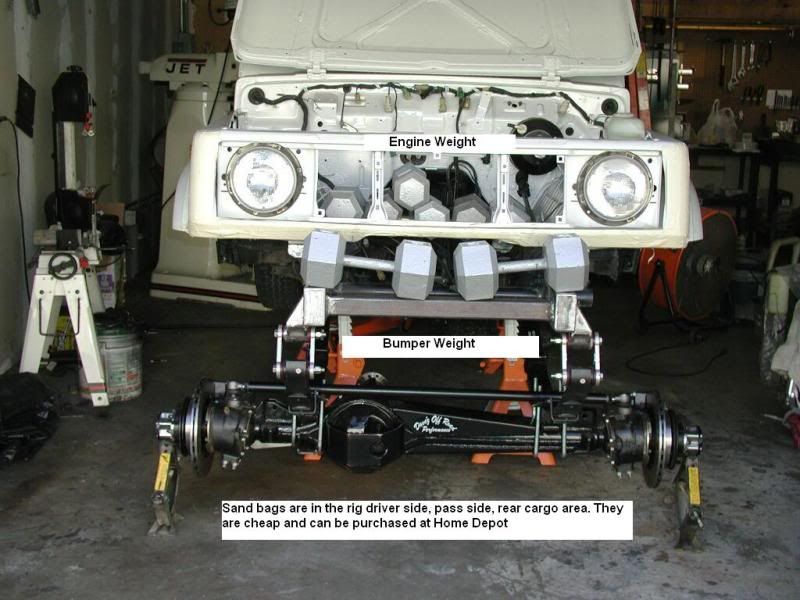
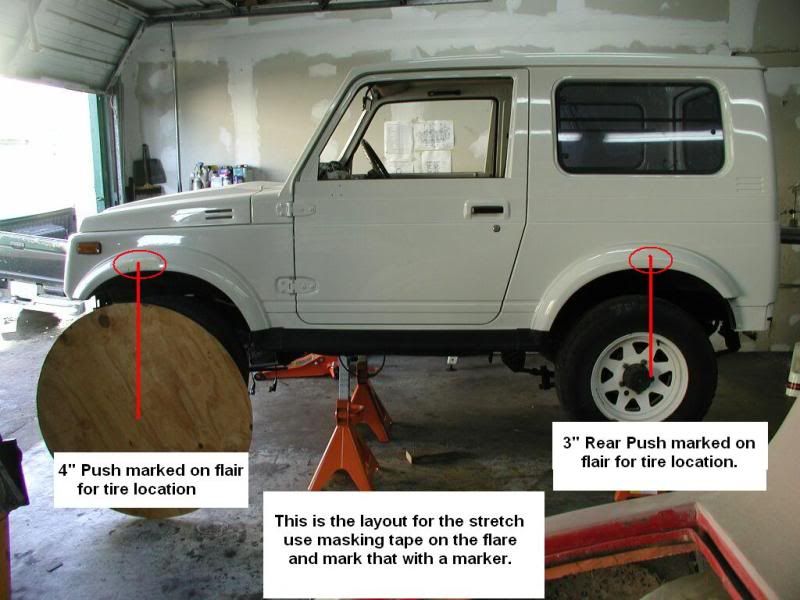
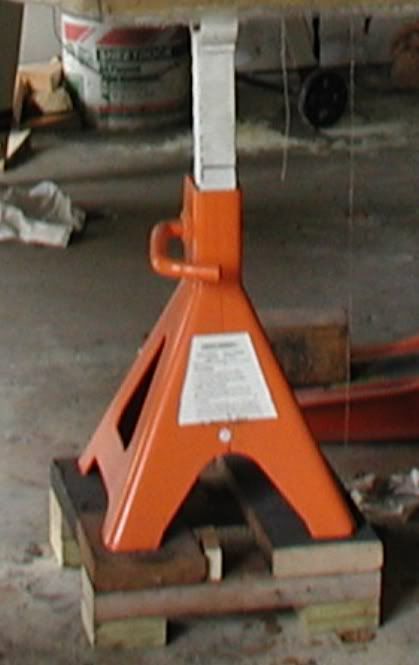
2nd pic shows how to lay out the stretch. I used masking tape on the flair and marked the position with a marker. I used string taped on the mared position with a nut on the end to get my axle positions. I also found out that my jack stands were not nearly tall enough. If I remember rite I needed to go up about 7 more inches

Image


This was a cheap extension out of wood for the stands to fix my problem. It worked out well.

Image

I hope this helps.

User avatar
TanZuk
Engaged 4wd low
Engaged 4wd low
Posts: 234
Joined: Thu Jan 05, 2012 11:17 pm
Location: Pompano Beach, Florida US

Re: Zuk on 38's

Post by TanZuk » Thu Feb 23, 2012 11:14 pm

Its the little things that help the most. I find using wood and cardboard for mockup is very cheap and less time consuming to use. If it doesn't work out no big deal.

I even machine up my proto type pieces from wood first. Just to make sure they work out.


Wood Extended High Steer Arm

Image


Finished Piece

Image

User avatar
TanZuk
Engaged 4wd low
Engaged 4wd low
Posts: 234
Joined: Thu Jan 05, 2012 11:17 pm
Location: Pompano Beach, Florida US

Re: Zuk on 38's

Post by TanZuk » Thu Feb 23, 2012 11:16 pm

Here is another thing I have not seen mentioned either. It is very important to get your suspension setup correctly.

Most of us have the Rig stripped down when we are setting it up for the new mods.

This is a Big Problem.

When you stick everything back in it the suspension you worked so hard to setup is not where you thought it was going to be setting. It is important to add weight back into the vehicle.

Try to add the weight where the parts are to be located.

This was my list:

1. Add sand bags to the inside to compensate for the parts that were missing. I got these cheap at Home Depot.

2. Add weights to the front extension to compensate for a front bumper. This is very important if you are going with a winch.

3. Add weights to the engine compartment for the missing engine.

Here is a pic of what it looks like.


Image


Hope This Helps

User avatar
TanZuk
Engaged 4wd low
Engaged 4wd low
Posts: 234
Joined: Thu Jan 05, 2012 11:17 pm
Location: Pompano Beach, Florida US

Re: Zuk on 38's

Post by TanZuk » Thu Feb 23, 2012 11:17 pm

Here is another example of not spending money on parts until I have a good idea that it is going to work.

Using materials I had laying around the shop consisting of:

Conduit Pipe
Duct Tape (used to wrap the threads on the Heims for a tight fit)
Masking Tape
Cardboard
Couple of 2x4 Wood Pieces
Couple old Heims from an old project.
2 old 5/8 Bolts

This was used to help me layout the Panhard Bar

Here is a pic Marked in detail to show you what was used.


Image


After looking at the above example I thought I should show the parts in their proper position. This will give you a better idea what I was using them for.

Image


Image


Again I Hope This Helps

User avatar
dan_2k_uk
I spend far too much time on here
Posts: 4924
Joined: Tue May 06, 2008 5:19 pm
Location: Swindon, Wiltshire

Re: Zuk on 38's

Post by dan_2k_uk » Thu Feb 23, 2012 11:18 pm

Amazing build. Keep it coming.

Love how methodical you seem to have been looks really nice.

Brilliant idea with the sandbags.

Dan
Image
Janspeed manifold, LWB Vit vented discs and calipers

Build thread -- Build photos -- HLA-Artwork
Coming soon: YJs, Trussed axles, Full float rear.

User avatar
TanZuk
Engaged 4wd low
Engaged 4wd low
Posts: 234
Joined: Thu Jan 05, 2012 11:17 pm
Location: Pompano Beach, Florida US

Re: Zuk on 38's

Post by TanZuk » Thu Feb 23, 2012 11:25 pm

dan_2k_uk wrote:Amazing build. Keep it coming.

Love how methodical you seem to have been looks really nice.

Brilliant idea with the sandbags.

Dan

Thanks appreciate you noticing.

I hope that all the little tips will save people money and help them figure out some difficult mods.

User avatar
ScottieJ
The Boss
The Boss
Posts: 11609
Joined: Tue Apr 15, 2008 12:13 pm
Location: Chippenham, wiltshire

Re: Zuk on 38's

Post by ScottieJ » Thu Feb 23, 2012 11:35 pm

I think that is a very handy tip.

When I built my YJ conversion I didn't have the weight of the engine or transmission. But I did think ahead a little and compensated for the fact that I knew the front springs would flatten out a bit more with the added weight. Luckily I made a good guess and I'm quite happy with the shackle angles.
Zuki Build

Steady as she goes!

User avatar
TanZuk
Engaged 4wd low
Engaged 4wd low
Posts: 234
Joined: Thu Jan 05, 2012 11:17 pm
Location: Pompano Beach, Florida US

Re: Zuk on 38's

Post by TanZuk » Fri Feb 24, 2012 2:34 am

ScottieJ wrote:I think that is a very handy tip.

When I built my YJ conversion I didn't have the weight of the engine or transmission. But I did think ahead a little and compensated for the fact that I knew the front springs would flatten out a bit more with the added weight. Luckily I made a good guess and I'm quite happy with the shackle angles.

Oh, Yes it can still be a bit of a hit or miss. Because it is just an estimation and you may have to add an additional bracket or 2 that you had not figured on.

I was shooting for 25 to 30 degrees at ride height. The YJ springs have a mounting location of 43” that is anus weight. I ended up at 42 ¾” for my mounting length for your Reference.
Last edited by TanZuk on Fri Feb 24, 2012 2:55 am, edited 1 time in total.

Post Reply